For those of you who are less familiar with this, just shout out anytime this is going too fast.
STEP 1: OPEN THE PROGRAMME!
Look for the lovely yellow flower:
 If you don't see the icon on the toolbar along the bottom of the screen, go through Finder/Applications and look for Adobe Photoshop Elements 2.0.
STEP 2: SETTINGS FOR NEW DOCUMENT
Congrats for getting this far! Click on 'new file' (and hit cancel if asked to register the programme; OK for any other error message). From the options you can see below you'll typically want to select A4 from Preset Sizes; 300 dpi for Resolution (if for printing off; 72 dpi if for web only); transparent from Contents, and RGB from Mode. DON'T CLICK OK AT THIS STAGE!!!!
Try changing the Resolution to 72 dpi - what difference does this make?
.............................................................................................................................
Now, switch the settings for Height & Width (to make this a landscape doc instead of portrait): so make Width 297.01mm and Height 209.97mm.
Wunderbahr. Now, give the new doc a name: RDogsYourName.
 NOW click OK...
STEP 3: SAVING UP

STEP 4: OPEN & FREE TRANSFORM A R DOGS PIC
Save the image at http://imagecache5.art.com/p/LRG/8/893/9FTJ000Z/reservoir-dogs--lets-go-to-work.jpg
Click

You'll now see a small version of this on top of your A4 document. We need to first of all bring this into our A4 document then enlarge it:
Check that the move tool is highlighted on the toolbar (top left of the screen - see pic below). Click within the RDogs image, hold the mouse button, drag into the empty part of the A4 document ... and let go.
The image now appears much smaller - Photoshop shows it how it is: a low-resolu

Now repeat the process but this time hold in the shift key until AFTER you let go of the mouse, then hit return. Everything should now be in proportion.
Holding in Shift ensures that the original proportions are maintained no matter how wobbly you are with the mouse!
STEP 6: STRIKE A POSE
You're going to transpose pics of yourself and other willing volunteers onto this classic image (and can then go on to do the same for any film poster of your choice), so will need to take a few snaps to use, and then upload these to your folder on the Lacie. Just before you do, I'll show you
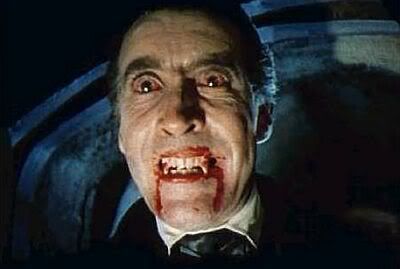
Save the image at http://i781.photobucket.com/albums/yy93/DBigs/Dracoola.jpg and open it up through Photoshop. I'll quickly run you through the main options - The Magic Wand, Lasso and Rubber tools - for removing Christopher Lee's head from the backdrop, then you can have a go with this, and then your pics of yourself and each other.
You can always use this guide (with accompanying images) if you want to go back over this later. There is a nice guide here, which you can download as a single pdf file. (You can find plenty more by googling 'photoshop elements 2.0 tutorials')
STEP 7: HOW TO GET A HEAD IN THE FILM BIZ
Thats been a swift run-through (if my psychic ability has worked), but lets see if you can now produce something as all round wonderful and glamorous as the example you're about to see (and which I'm definitely not uploading!)...

I'd like y
- a personalized RDogs poster
- personalize any other poster of your choice - you can use the same cropped head-shots you used for 1
- poster/s for your coursework film (as with Lucy/Lauren/Kristie's effort which I'll now hold up...)
- a sleeve for your new Collector's Edition DVD, listing all the splendid extras it features
- a jewel box sleeve/cover for the OST CD of your coursework film, where you've thjought out which additional tracks would have featured in the remaining 88+ mins of your film (don't everybody use Napalm Death* though!)
* I see N.Death remain a by-word for weirdness: check out the name-check in the 2nd + 3rd last paragraphs of this June 2009 review!
No comments:
Post a Comment